
Fury in the Wilderness
After trying A Most Dangerous Time, Mark and I turned our attention to the recent Rebel Fury from GMT. We picked the Wilderness scenario, since that’s always been an interesting battle, and I’ve tended to gravitate to it for the tactical side of the ACW ever since it was the first scenario when my dad got SSG’s Decisive Battles of the American Civil War, Volume III.
Mark had the Confederates, who get six moves before going to the game’s standard back-and-forth on moves. Personally, I think he should have come into contact with Griffin (a)’s division (though that would chew up three moves), and lock up the entire Union army [generally, units are divisions in this game, but this scenario breaks almost all of them into two parts—a and b]. Instead, he got a small line in place further down the Orange Turnpike, Hampton’s cavalry guarding the flank (needed either way), and started down the Orange Plank Road.
As it turned out, this gave me enough rope to hang myself. Before Mark could decide to gum up the works, I got Griffin’s division through to back up Wilson at Parker’s Store. When I sent Barlow’s division from the Chancellorsville position south to secure the goal, F(itzhugh) Lee got in the way, and ended up separating the two parts of the division. I got Wadsworth through and facing off against Rodes, and Getty inched forward into contact with Johnson, who was getting close to the Germanna Ford. There was a nice gap in the marching order, and Mark finally dived into it.
Early a went forward, and Crawford a moved into contact, and then Early b went through the gap, and I protected the Culpeper Mine Ford with part of Wright. The not-engaged part of Rodes then took off into the gap, and I should have moved Torbet to protect Ely’s Ford, but instead moved Wright into contact.
The strategic goal for the Confederates is to take out one or more of the pontoon bridges at the fords. Once that’s done, it’s a strategic victory for them, and I’d basically been fool’s mated into it. Not that we realized that at the time. It’s Mark’s game, so I didn’t have the victory conditions to read and re-read (I merely thought I couldn’t achieve a strategic victory). Also, the language around taking down a pontoon bridge confused us (“can be voluntarily removed … as its entire activation during a Movement Phase“; had us thinking of needing to be there for the full phase—instead it seems to be saying it can’t activate to demolish during battle, which wouldn’t have occurred to us). We played on, even after realizing that Rodes had the opportunity to get the pontoon bridge. (Well… perhaps not: I move as close as I can—ZOI, Rodes switches to battle formation, blowing his move, then I move into contact, and you can’t do it while in ZOC. Still, I blew it there.)
After all that, the Confederates were somewhat short of new divisions to go on long treks with, and Mark passed, leaving me 19 (the maximum possible) moves to finish up my dispositions.
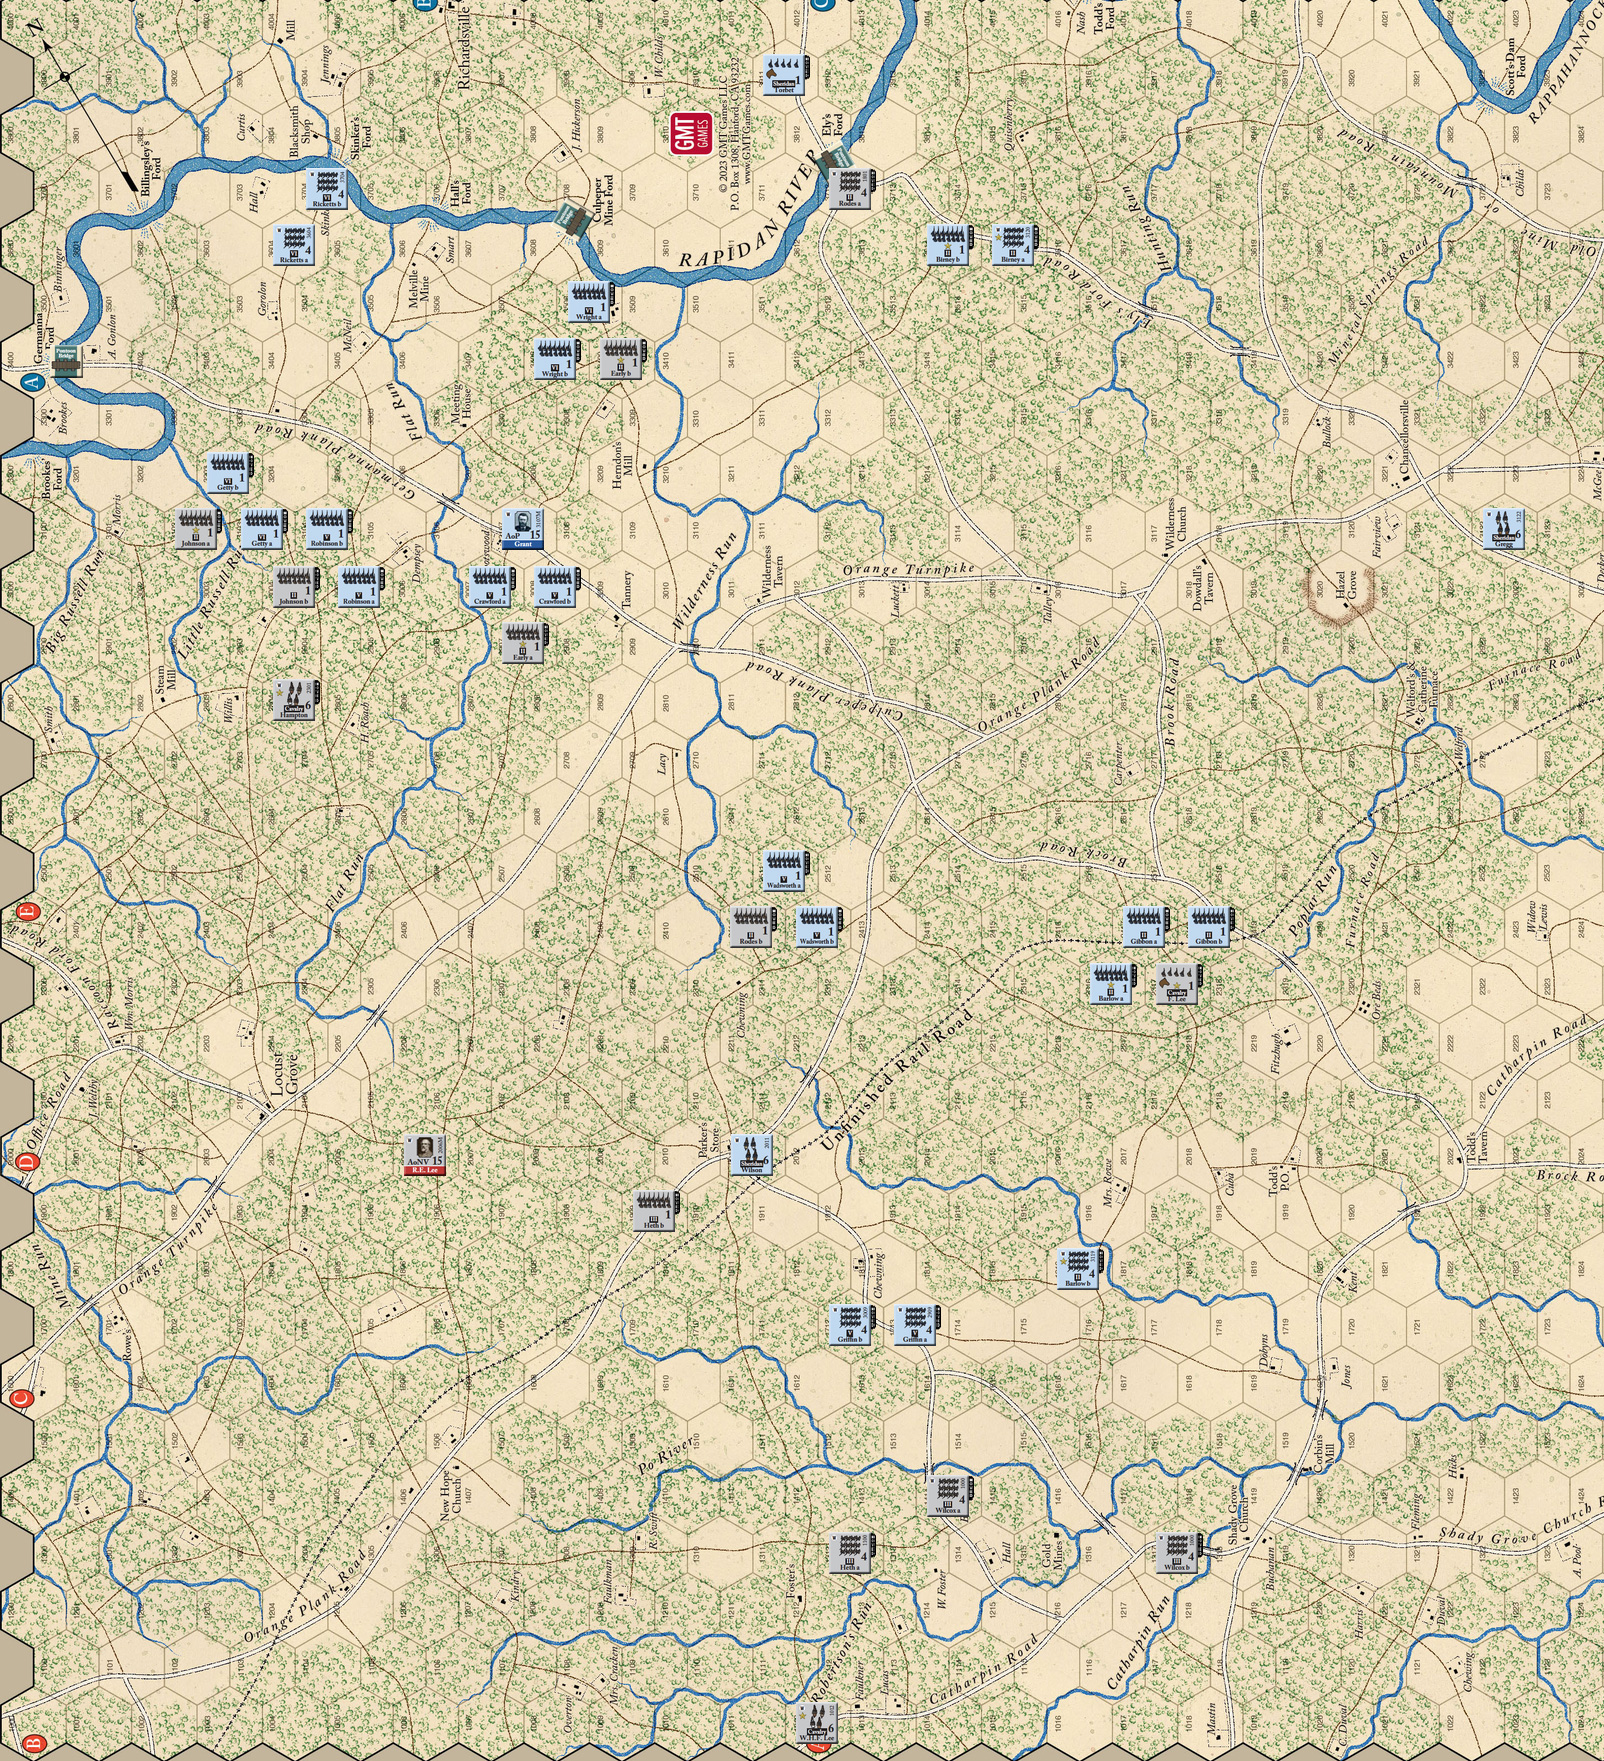
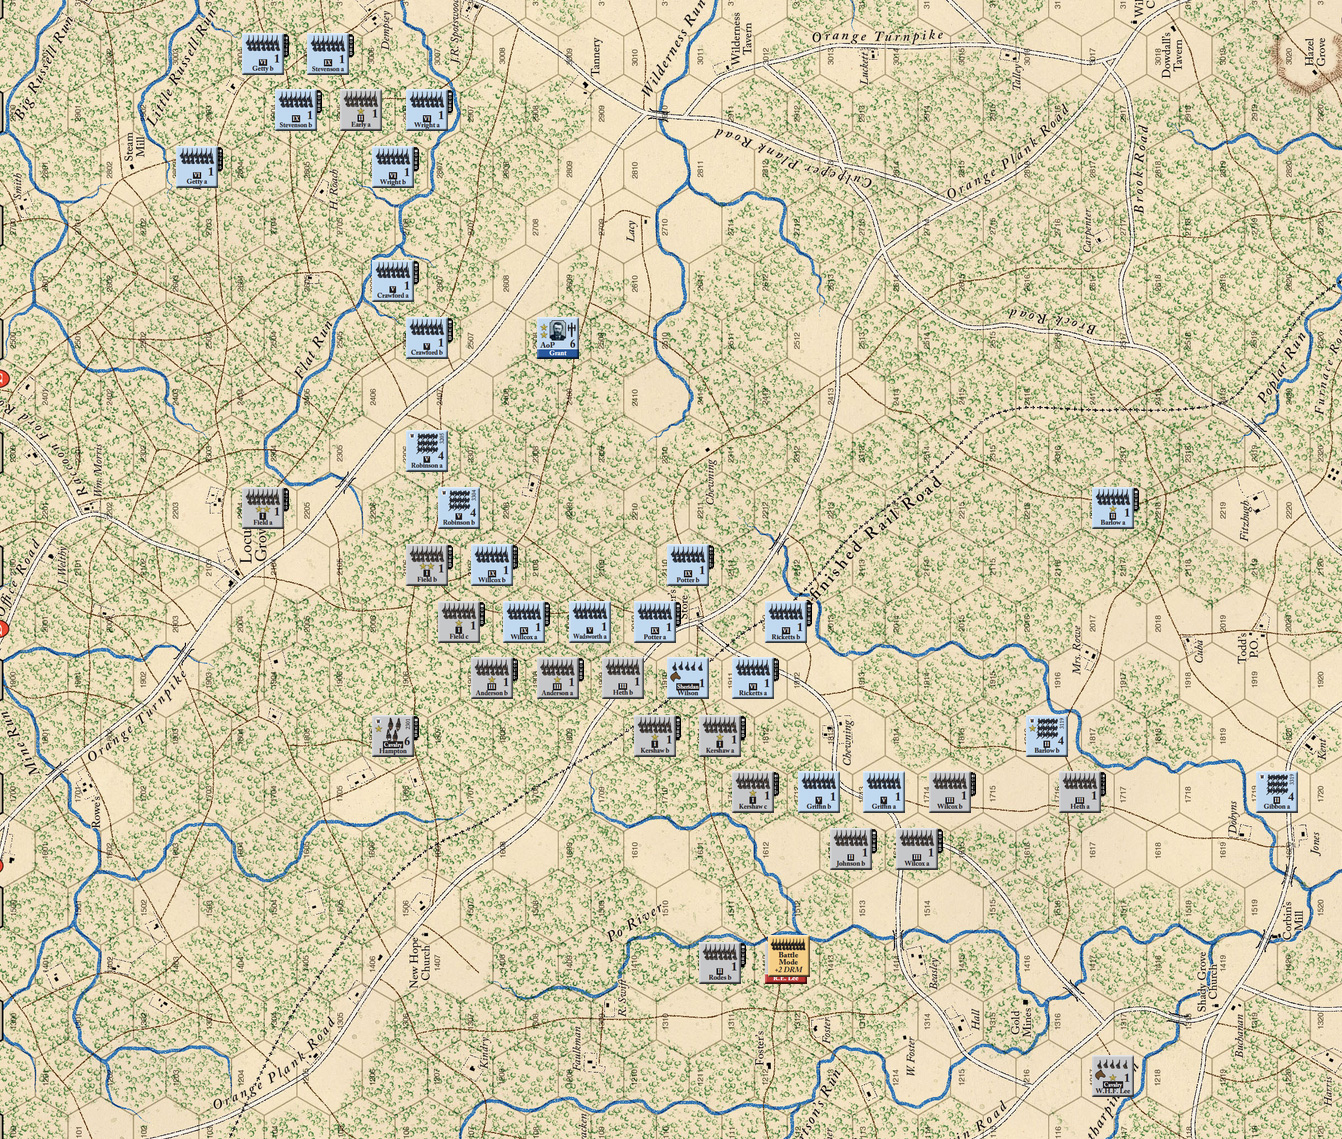
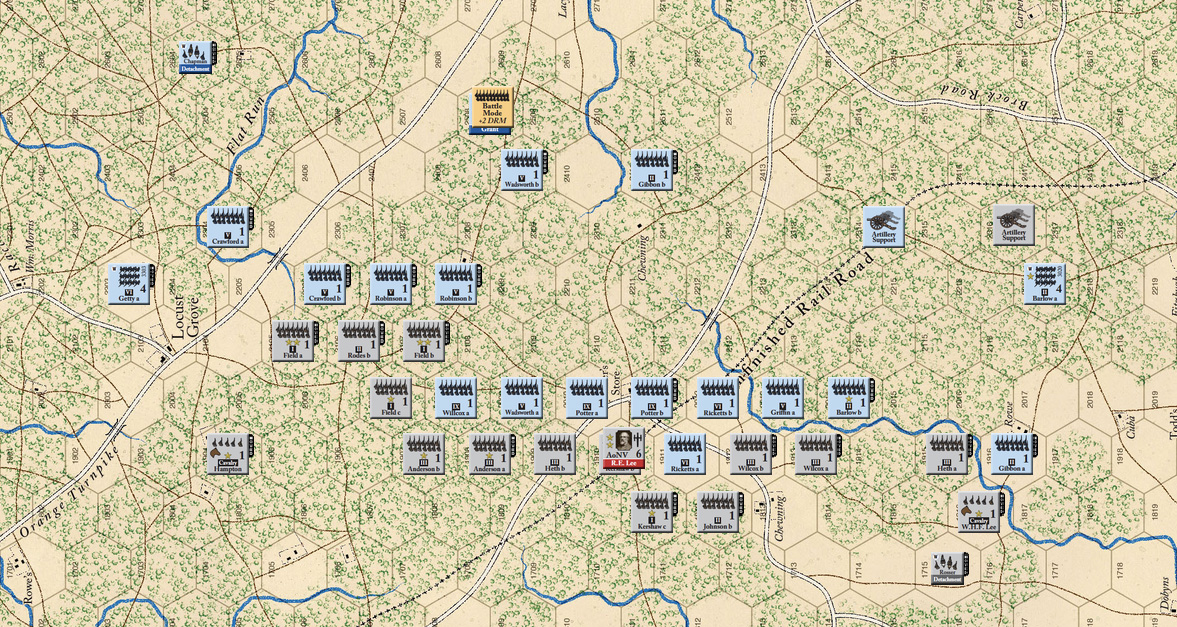
All images are right after movement is done for the turn.
Mark didn’t attack at all, and the roll gave me nine attacks; I used six. I got very lucky with Mark rolling poorly in five combats, giving me SA:A results, and the blown die came up as ‘blown’ each time. (We looked at the physical die: 1/2 blown, 1/2 retreat—I’d been wondering it it was 1/3 or 1/6 retreat.) I had one combat with a bad roll, which was the one that Mark rolled well on, and blew Crawford a.
The second turn (May 5 PM) saw Mark put Lee’s HQ into battle mode near the goal area (Entry hex A – the Union strategic goal had been to get a supply line from the fords to that area), while Grant shifted south to allow better maneuvering on that flank. Mark worked out a basic line from the Orange Plank Road to the Catharpin Road and passed. I had worked out parts of my line, but hadn’t even gotten to the three reinforcing divisions; with all the unengaged units, I had no problem getting the maximum number of activations. This still meant the reinforcements didn’t get far, though I pinned Rodes and Early. Combat was in the Confederate favor this time, with one attack blowing part of Gibbon’s division (and knocking out the only unit I had forward in the south), and my attacks blew one of my own divisions (SA:SA), and forced Early to retreat (for our first non-blown result in defensive terrain).
Lee was forced to remain where he was for turn 3 (May 6 AM), while I put Grant in battle mode in range of fighting near the Culpepper Plank Road and Parker’s Store (I later decided this was likely a mistake). The Confederates get three divisions in reinforcements, but now paid the price for the bad die rolls on the first morning. “Blown” units come back two turns later; or two of them do. Any more are considered eliminated instead. This seems excessively harsh. Certainly, there’s limit to how fast the army can reform, and having so many units disorganized at once would do a lot to make it harder to sort anyone out in a timely manner. I think I’d still go for an eliminate half (past the first two) and push the rest to the next turn (which may help overload that turn…).
With seven extra units (two of the new divisions were split in three), my line suddenly seemed a lot thinner. Thankfully, I still had last turn’s reinforcements, and by the end of movement we had some solid lines getting established. In fact, I was having trouble figuring out where to park things for proper divisional integrity, and caused myself some problems. I finally passed, and Mark finished up a line from Orange Plank Road to the Orange Turnpike.
Mark forced Griffin a to retreat, but Griffin b forced Wilcox a to retreat. Meanwhile Early held off two attacks, forcing parts of Union divisions to retreat. (We completely forgot to roll the blown die in defensive terrain these attacks.) I had one more failed attack before passing (losing the unit—units blown in the last two turns are considered eliminated for victory purposes). Mark managed to get rid of Wilson and forced Barlow b to retreat, but lost Kershaw a to a failed attack.
Grant was forced to stay in place for the last turn (May 6 PM), while Lee relocated to the north where the main fighting now was. Mark’s first move enveloped the end of my line, but I quickly extended from there. He also moved in to surround Ricketts, and I tightened up my other flank as best I could. Mark started combat by trying to pick off Ricketts a, but rolled poorly and retreated. I tried taking the rest of the pressure on him off with a counterattack on Wilcox b, but neither of us rolled well for another attacker retreat. Ricketts a held off another attack to get a clear retreat path (which meant there was no longer a reason to attack). I tried one last time on Early, but suffered a blown division for my trouble. Mark tried an attack on Willcox a, which was also defeated, and we both passed rather than dig ourselves deeper.
Mark had already won a strategic victory, as discussed earlier, but the final VPs at this point came out 4 each for a Confederate tactical victory too.
Afterword
This game gets a very mixed reaction from me. Part of me really appreciates how well a very streamlined and simple system does, but another part just doesn’t feel that it works.
Some of it is definitely just wrapping my head around some of the abstractions going on and getting comfortable with them.
However, combat is decidedly flawed. The two part ‘advantage’ and ‘results’ scheme is very interesting, and I like it, but some more nuance is needed. The most obvious problem is that a unit can be completely surrounded, but if it’s in good terrain (and being a good unit helps), it is likely to wreck several divisions and still be there, as it will do well on the Tactical Position chart, and it’s not unlikely to get SA every time.
Since there’s no better result, and defense (rightfully) trumps offense, and every division loss is a VP, there’s little incentive to launch attacks on such units. You can maneuver to your heart’s content, but as soon as you pick off any misplaced units (seen in the final turn here), there’s little motivation to attack. This does actually get at the primary lessons of Civil War battles, but does not align your motives with the generals’. Here the only reward for successfully pressing home a tough attack is probably another tough attack. Unless they’re using a stream for defense, getting around a flank doesn’t do much.
I think a modifier similar to GCACW’s flanking bonus would do a lot to help the “surrounded” problem. -2 to your position die roll if all six of the hexes around the defender have EZOC/enemy unit on them without any friendly ZOC/units other than the defender himself; -1 if five hexes do. (Minuses to the battle rating would be much more in line with the rest of the system, and probably to be preferred. I think DRMs would have more the effect I’m looking for though.)
A somewhat more subtle problem is that someone always retreats, or worse (often worse in rough terrain). Given the fact that you can keep attacking in a turn with the same units, a ‘contact’ result that doesn’t push the attacker out of line (at the least) seems to be perfectly reasonable. That one’s tougher—presumably it’d just be on a SA:SA result, but shouldn’t even happen all the time there.
> there’s little incentive to launch attacks on such units. You can maneuver to your heart’s content, but as soon as you pick off any misplaced units (seen in the final turn here), there’s little motivation to attack.
This is particularly noticeable in one of the other scenarios where the Union has a couple of detachments out that are easy picking on the first turn.