
Two Rounds of River Hippis
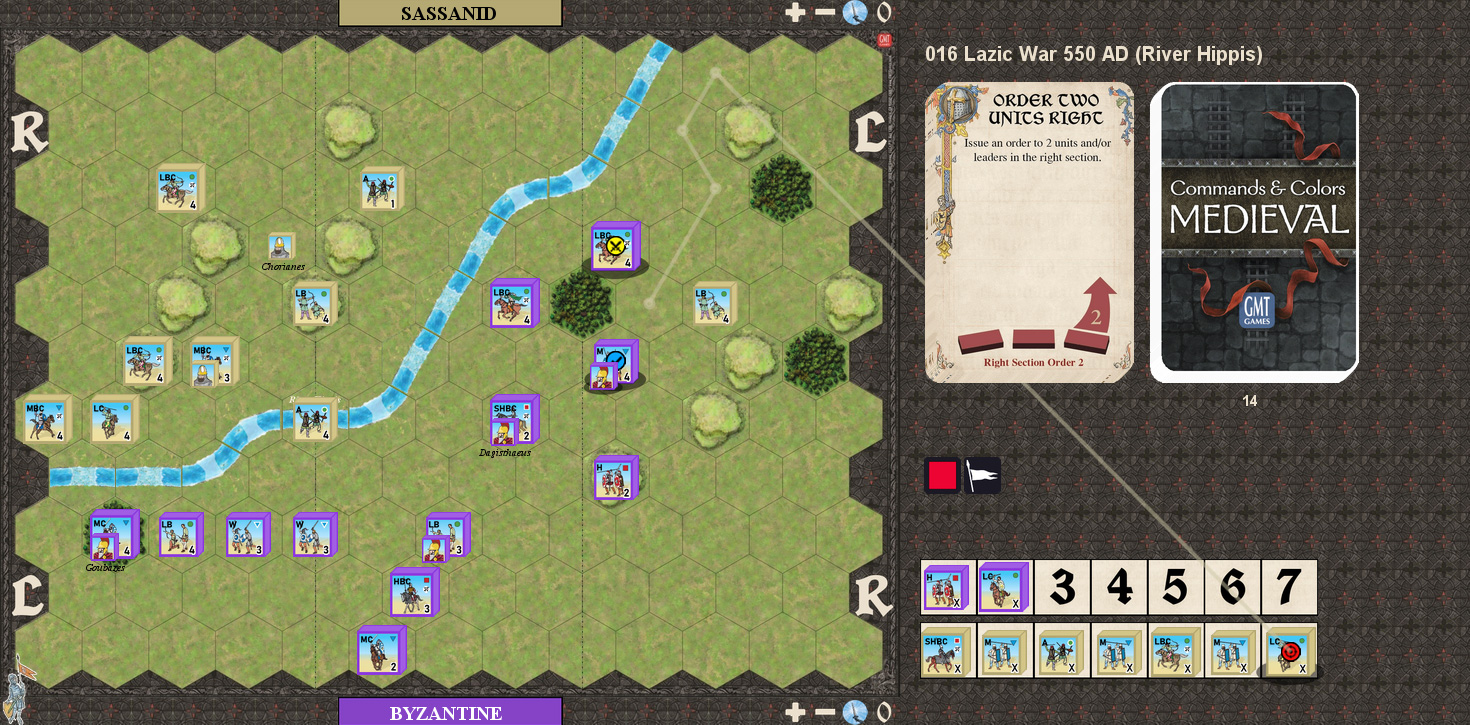
To celebrate the release of the first expansion to C&C: Medieval, Mark and I returned to the game. Of course, the new Vassal module wasn’t out yet, so we ended up playing one of the original scenarios. Namely, the third Lazic War scenario, which has a fair amount of terrain involved.
I had the Sassanids the first time, and started with a Line Command to advance my right, Mark started Forward, and got one block with ranged combat. I Counter Attacked, and used the opportunity to get some of my center over the river. Mark Ordered Three Center to close up with his infantry, and I used Move-Fire-Move to activate the flanks driving some LBC off hills he had occupied. Foot Onslaught brought us into contact, and I lost two blocks each on two units, using Bravery to keep the second in some woods while the other retreated across the river, and I did one block in return.
Leadership Center let me bring in the SHBC, and I knocked out a Heavy and reduced a Medium to one block at a cost of one block. Mark regrouped Forward and drove off a LBC and did a block to a weak Medium. I Cried Havoc to order the SHBC and a couple lights, driving off a Medium, doing a hit and two banners to a Heavy, which used Bravery to only go one hex, which I then drove back another hex after doing another block on momentum. Mark Rallied the Heavy and Medium up to full and took a new leader, and did a hit to my evading SHBC. I Ordered Mediums and did a hit to a MC. Leadership Right w/Foot Onslaught let Mark get into contact in the center again, knocking out the SHBC, but I Ambushed his SHBC for two losses and two banners. I also took two hits on a LBC, and my Medium in the woods took another block while doing one in return. I Ordered One (Heavy) for no ranged damage, and used Leadership Any to finish off my weak Medium and do a block to an Auxilia.
Order Three Center got me back across the river and did two blocks to a Medium. Order Lights let Mark re-form in the center, but did no damage, while Coordinated Attack did one block to a HBC. Order Three Left let Mark reshuffle that flank, spoiling a long-term plan of crossing, getting the weak unit in the woods, and advancing out, but I didn’t have the cards anyway. Left Leadership let me drive his Medium out of the woods with Fire and Close with one block left. Mark used Any Leadership on his right to Rally, bringing the Medium up to full. Order Two Center got me a block on a Heavy, but battle back did three to me. There were a few turns of no result, and then another Any Leadership with Rally let mark get a block back on his Heavy, though he simply reformed his flank. Order Three Right let me take a block off a Warrior, and Order Two Left returned the favor on a MBC. I Out Flanked for a ranged hit on his Heavy.
Mounted Charge let Mark engage on both flanks, knocking out my Auxilia in the woods, with his SHBC, which I Ambushed again, but got no hits on, and he got two hits on a LC, but lost his to a hit plus banner. Any Leadership got my center moving through the river, but I got nothing for a Rally and merely lost a block in combat. Coordinated Attack let Mark finish a Medium and force a second across the river, while a LBC evaded to my baseline. Foot Onslaught let me strike back, but I couldn’t do anything. Order Two Right finished off my LBC, while Command Right did a block to a LB and let me attach my leader to a weak Medium, while an Auxilia forced a HBC from the river. Mounted Charge did five blocks across three units, wiping out Charianes’ second command. Order Three Center forced the SHBC to retreat, but Order Two Right forced my LBC offboard. 2-7
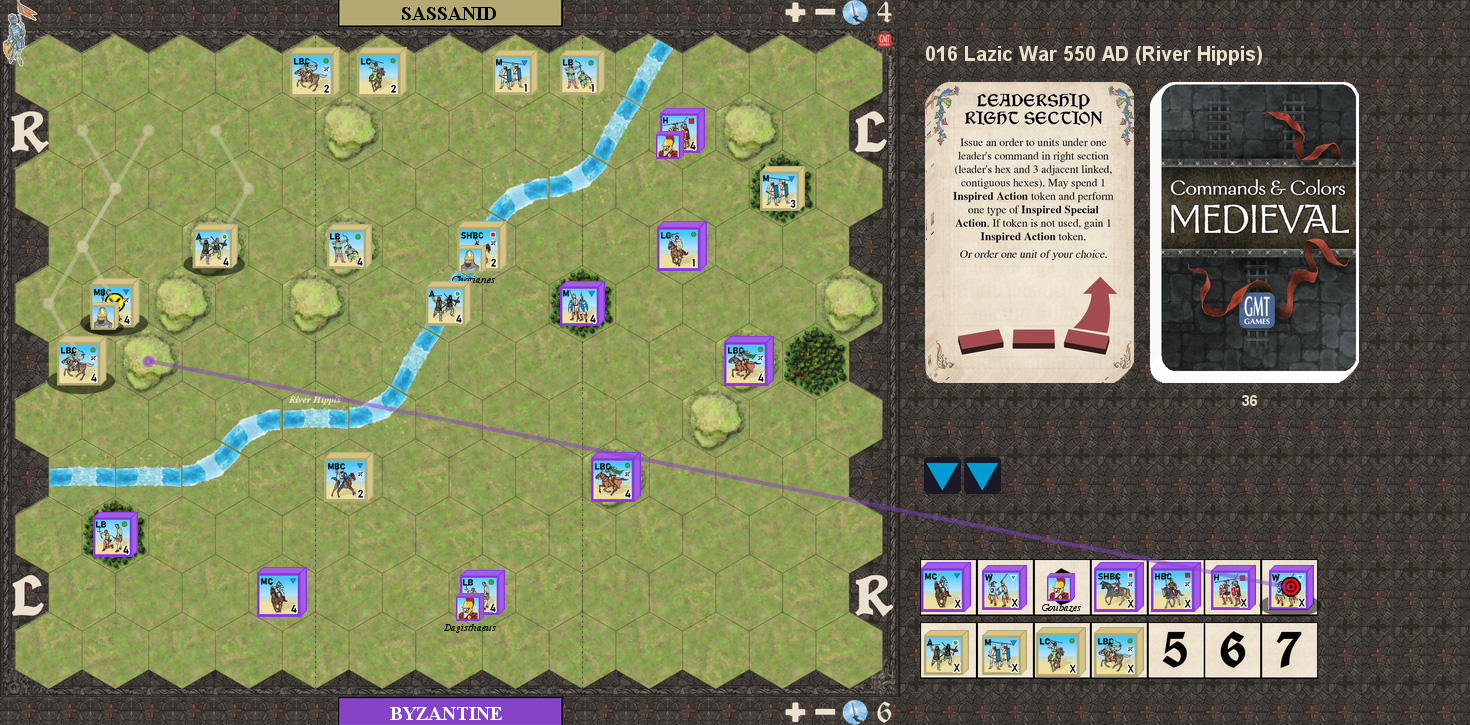
For the second game, Mark started with a Coordinated Attack to move forward but little else, while I Scouted to do a block to a Medium and force it into the river. Mark Ordered Mediums to reshuffle a bit, and did a block to an evading LC. I Ordered Three Left to line up along the river, and Any Leadership let Mark line up on the far bank. I then used Any Leadership to wade into the river on my left, and drove off a LBC. Coordinated Attack killed a block on one of those units, and Left Leadership with Mounted Charge (which only counted for one unit…) got me out of the river and did six blocks across three units, driving them all off, and taking one block in return (from First Strike).
Mark Ordered Two Right to finish off my MC, and I Cried Havoc to get on the left hills and do a block each to two units. Mark Counter Attacked to pull a weak LC out and did three blocks to a Warrior, and took a hit in return. Line Command started moving up my center, and Mark Out Flanked to pull back another two units, but lost one block for nothing. Order Three Center got me a little closer, and I did a block at range. I followed with Foot Onslaught which traded three hits between a Heavy and SHBC, and did two blocks to an Auxilia. Mark Rallied to get two blocks back on the SHBC, and one each on LC and MBC, and the latter finished off a Warrior. I Ordered Heavies to pull my Heavy back, and send in a fresh Heavy, SHBC and HC, finishing off a Auxilia, doing a block to a Medium (and forcing it out of the river), and did a block to a LB on momentum.
Mark Ordered Two Center to do a block to the HBC, and I Mounted Charged into the river, finishing off a Medium, doing two blocks each to another and a LBC, but taking three on my SHBC. Mark then did a Mounted Charge to pick off a loose leader and finish off the SHBC, taking two hits on LC in return. Clash of Shields ordered three units, but the HBC was killed by First Strike, while I finished off a LC. Order Three Right thankfully did nothing, and Coordinated Attack did one block to each of three units. Command Center put Mark into the river, and finished off my weak Heavy. Command Right got me at a couple units at/near the baseline, and let me finish off a LBC. Right Leadership let Mark Rally three blocks on an Auxilia and one MBC, and finish off a Warrior. 4-7
Afterword
The first game especially had stretches with not a lot going on. Part of it was I having problems finding anywhere that I wanted to deal with the river and come to grips with Mark. But, I was also just realizing that it is harder to have a high-impact fights, since there’s a lot of resisting sword hits, and nothing does five dice damage. So, there’s a lot more trying to get help from cards or leadership abilities.
Rally is also more powerful in C&C:M, as you don’t just rally units with/adjacent to a leader, and Mark had very good rolls to undo all the hard-won damage I did to the big units. My luck with Rally has generally been poor, and my attempts here didn’t do any better.
Still, it’s an interesting scenario, since the river really chokes things up.
Discussion ¬